
PT 7 : AR15 UPGRADE - SCOPE MOUNT AND PROJECTION RETICLE ADJUSTMENT
February 14, 2019
Learn how to install and adjust your Vortex Viper PST scope with this detailed guide on projection reticle alignment.
Quick Look
Overview
In the world of shooting, proper scope installation is crucial for optimal performance. Whether you're preparing for a competition or simply honing your skills, understanding how to install and align your optics correctly can make all the difference. This guide will walk you through the process of installing a Vortex Viper PST 1-4x24 Riflescope and adjusting its reticle for precise accuracy.
What This Video Demonstrates
This video focuses on the installation of a Vortex Viper PST scope paired with a Primary Arms Deluxe AR15 Scope Mount. It covers everything from the initial setup to the fine-tuning of the reticle using a methodical approach involving a plumb bob for vertical alignment. This hands-on demonstration is not just for beginners; even seasoned shooters can benefit from a refresher on scope adjustments.
Step-by-Step Explanation
The first step in this installation process begins with the basic layout of your workspace. Stabilize your rifle on a sandbag and secure it using a vise or similar tool. This stability is essential for making precise adjustments. The presenter uses a Wheeler magnet level to ensure that the rifle is perfectly vertical, which is crucial for accurate scope alignment.
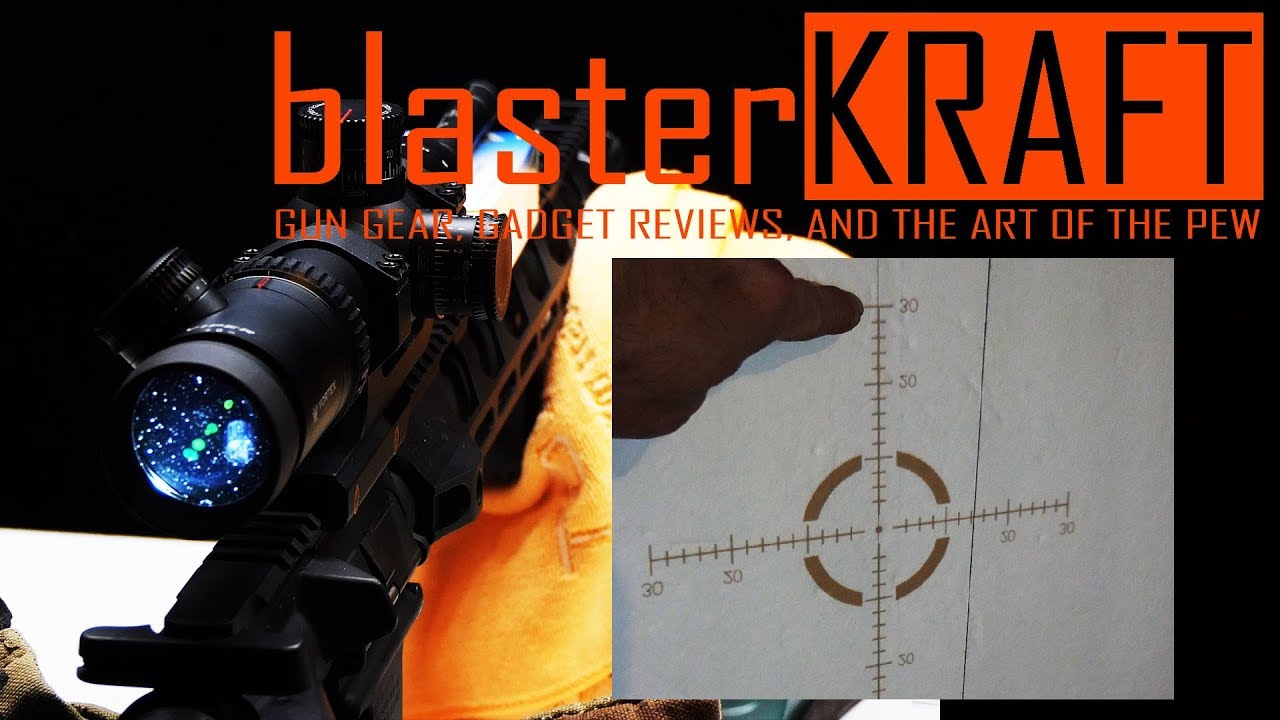
Traditional methods of leveling a scope can be problematic, as they often assume a perfect factory calibration. Instead, the plumb bob method utilized here allows for a more individualized setup. By projecting the scope’s reticle onto a whiteboard using a flashlight, you get a clear picture of its alignment against a static point, thus ensuring that the reticle is perfectly aligned with the rifle’s barrel.
Once the reticle is projected onto the board, adjustments can be made to the scope itself while keeping an eye on the plumb line shadow. This clever use of common materials illustrates how shooters can achieve professional results without expensive equipment.
After visual alignment, the next task is tightening the scope mounts to a specific torque to ensure a secure fit. Using blue thread locker and a torque wrench allows for maximum stability, which is vital for maintaining the accuracy of the scope.
Key Tips
- Always ensure that your base is level before starting any installation process.
- Using a plumb bob method can greatly improve the alignment accuracy of your scope’s reticle.
- Make incremental adjustments and regularly verify each step to avoid compounding errors.
- Future-proof your setup by considering additional equipment like backup iron sights during the installation.
Key Takeaways
Installing a scope like the Vortex Viper PST can seem daunting, but breaking it down into manageable steps simplifies the process. This video not only emphasizes the importance of installation precision but also provides real-world tips that can enhance your shooting experience. Remember to take your time, verify your setup, and enjoy the learning process. With the right approach, you’ll ensure that your scope performs optimally when it counts the most.